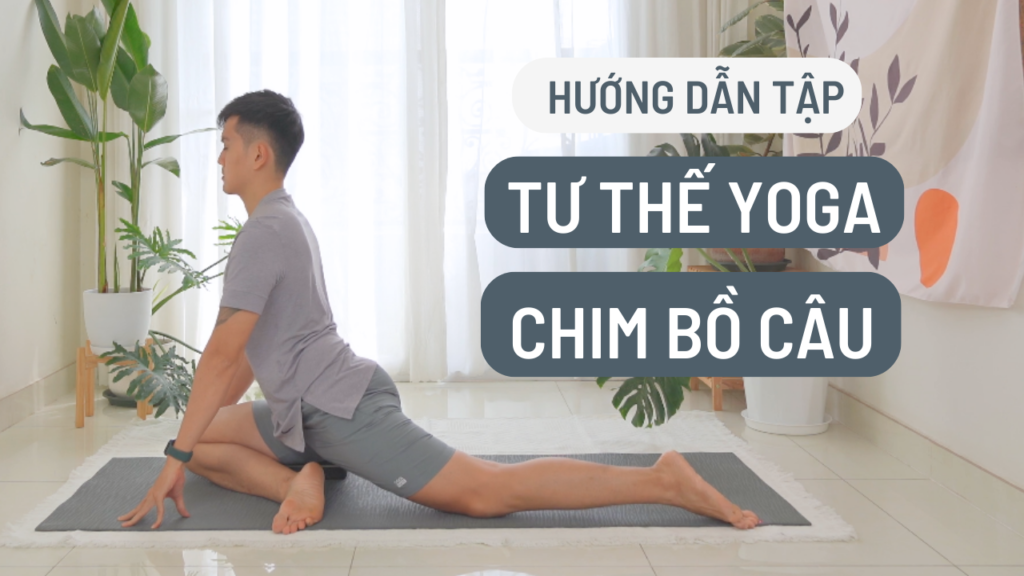
Pigeon Pose This is a very popular Yoga pose. This is a very good pose to open the hip joints and increase hip flexibility. However, it also carries many potential dangers that you need to pay attention to. In this article, let's join Nguyen to discover more of its benefits, as well as how to effectively perform Pigeon pose.
What is Pigeon Pose?
Pigeon Pose - Kapotasana is one of the basic and important Yoga movements. It originates from the shape of a pigeon when it rests on the ground. This pose helps stretch and open up important muscles such as the hips, thighs and shoulders, while also improving the body's flexibility. Whether you are just starting out or are experienced, this pose has great benefits for your health and well-being.
Benefits of Pigeon Pose
Pigeon Yoga pose is not simply an exercise movement, but also carries a series of positive benefits for the musculoskeletal system as well as the mind:
- Helps stretch stiff thigh muscles: Pigeon pose helps stretch the thigh, hip, pelvic muscles, back muscles and psoas muscles. This helps relax the muscles and improve flexibility in the hip area.
- Opens the hip joint, increases hip flexibility: This position helps increase the ability to rotate and open the hip joint, along with lengthening the hip flexor muscle group. You can play sports more safely and comfortably.
- Back pain relief: This pose helps relieve back pain by expanding the back and hips, reducing pressure on the back.
- Mental relaxation: In addition, because it stretches the hip joint and pelvis, it also helps relax the mind and reduce stress, especially if the nature of your job requires you to sit a lot.
Instructions for practicing Pigeon pose
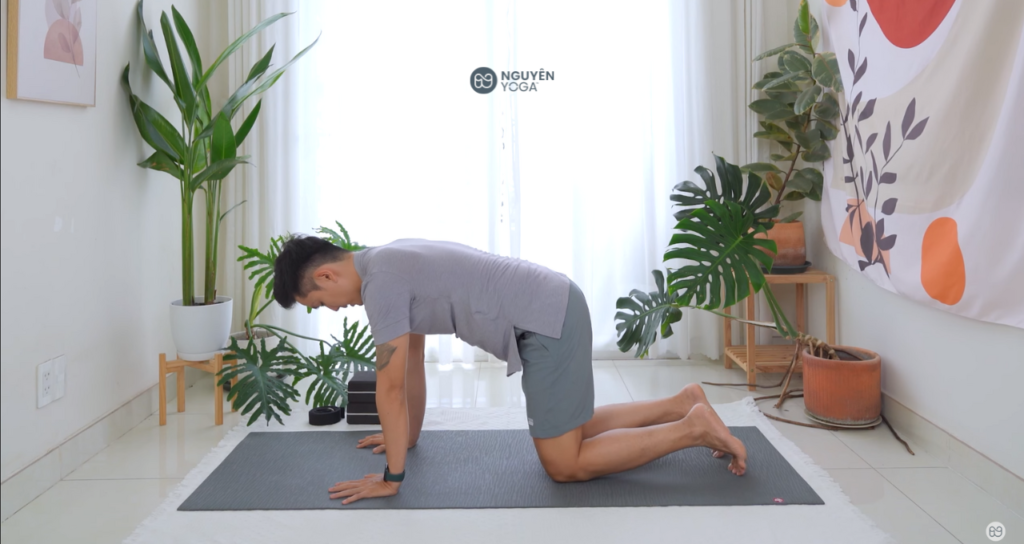
- To do this pose, start in Table Pose or Downward Facing Dog Pose.
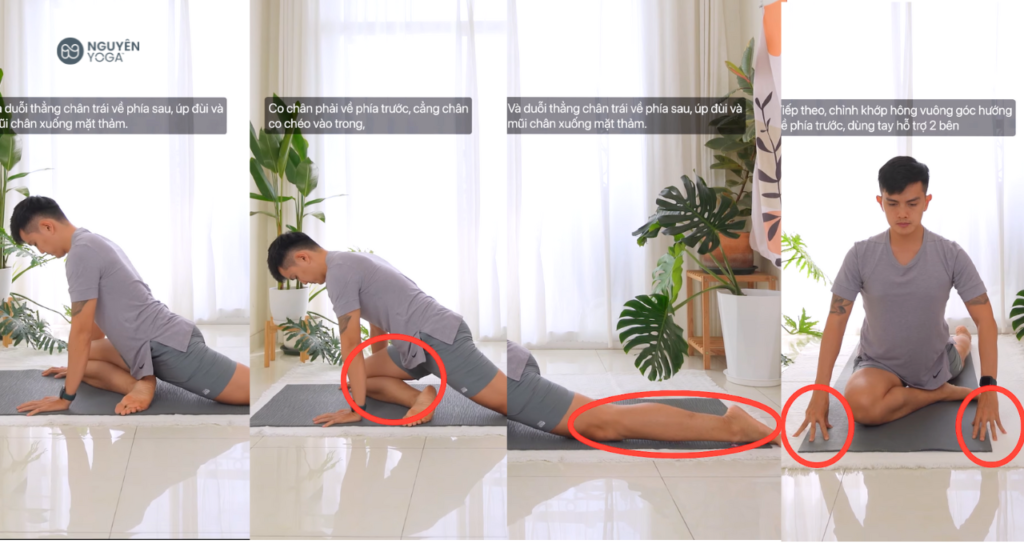
- Bend your right leg forward, shin diagonally inward, and stretch your left leg straight back, placing your thigh and toes flat on the mat.
- Next, align the hip joint forward perpendicularly, using your hands to support both sides.
Some notes when practicing Pigeon Yoga pose
1. Low back pain
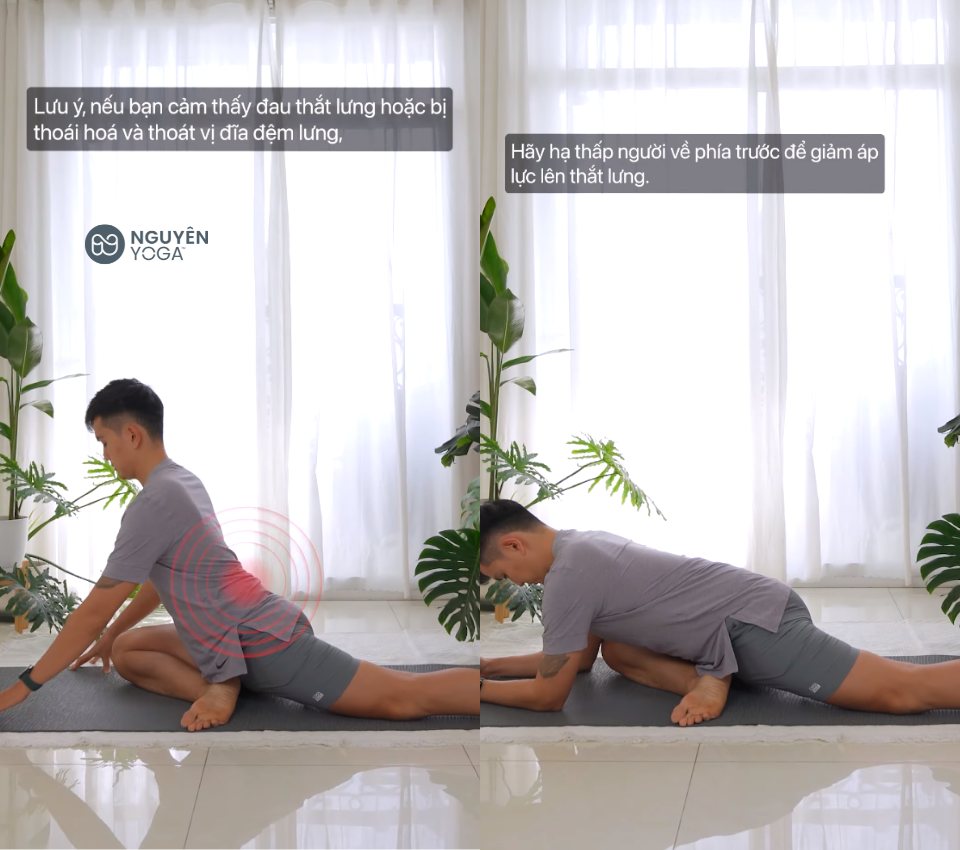
Note, if you feel lower back pain or have degenerative disc herniation, lower your body forward to reduce pressure on your lower back.
2. Hip misalignment error
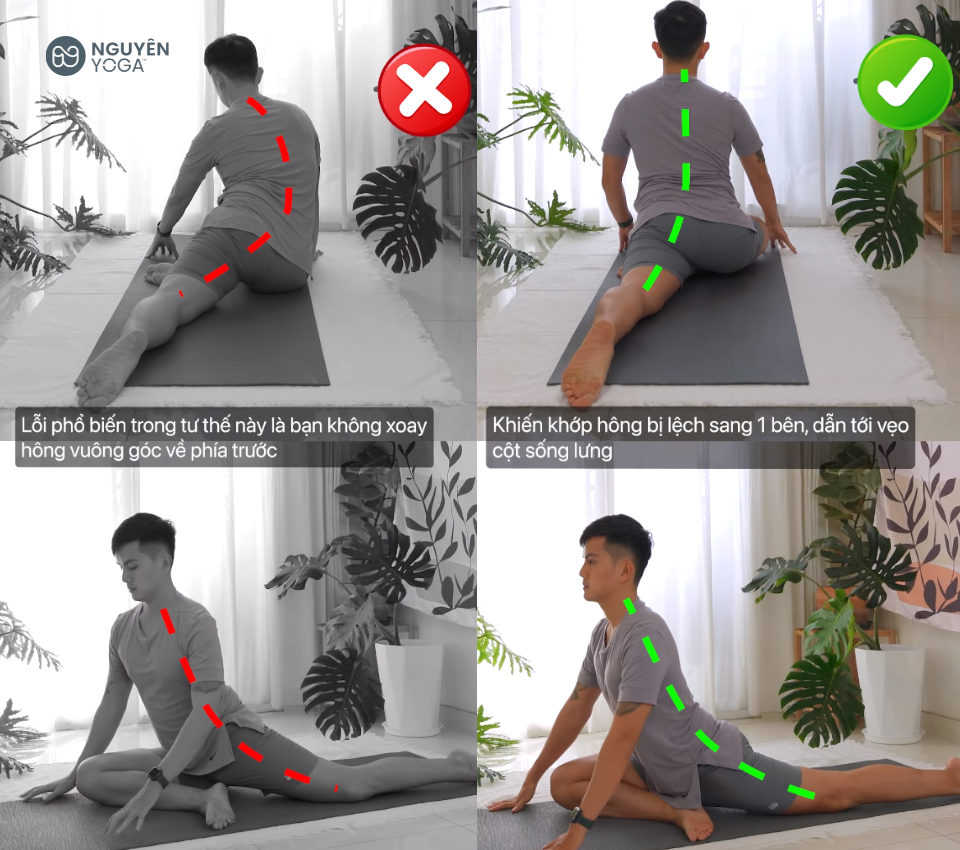
A common mistake in this posture is that you do not rotate your hips perpendicularly forward, causing the hip joint to shift to one side, leading to curvature of the spine as well as not achieving the purpose of the movement. Rotate your hips perpendicularly forward.
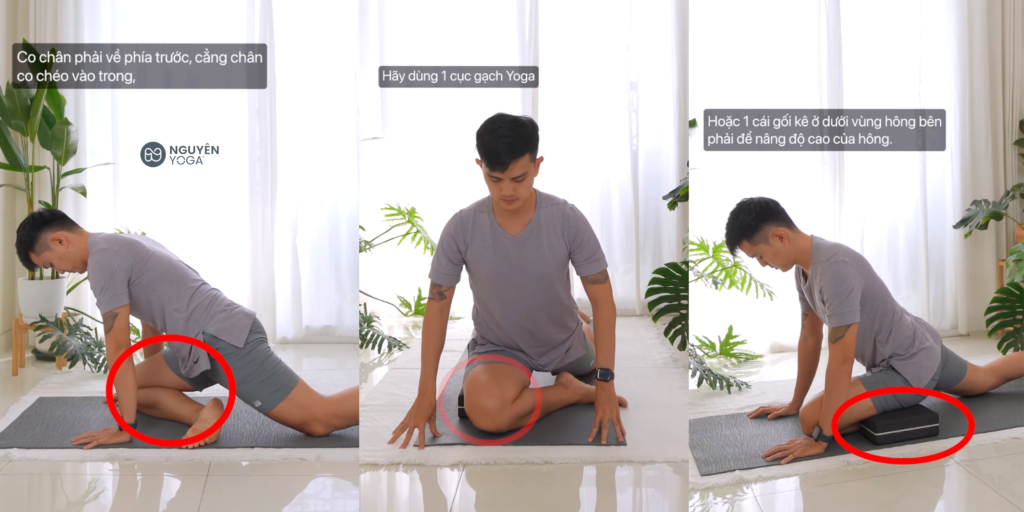
Note, if your hip joint is stiff and has difficulty rotating and stabilizing the hip joint. Use a Yoga brick or a pillow under the right hip area to raise the height of the hip. Alternatively, you can also do the pose on a platform or high chair. Another variation is that you can sit in a chair or do this against a wall.
3. Stiff hip joints
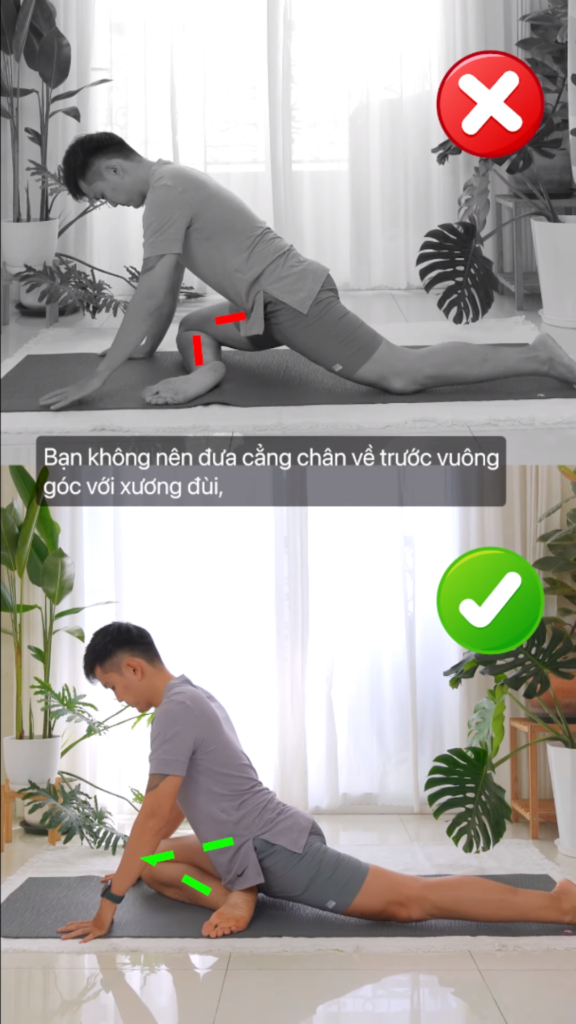
The second most common mistake is that for those with stiff hips or knee pain, you should not move your lower leg forward perpendicular to the femur, because it can lead to injuries to the knee ligaments, causing joint damage. pillow. Bend your legs inwards.
Nguyen hopes that my sharing will be useful for your journey of conquering Warrior 3 Yoga pose. You can refer to many other articles or movement instruction videos at Website Nguyen Yoga or channel Youtube Nguyen Yoga.

