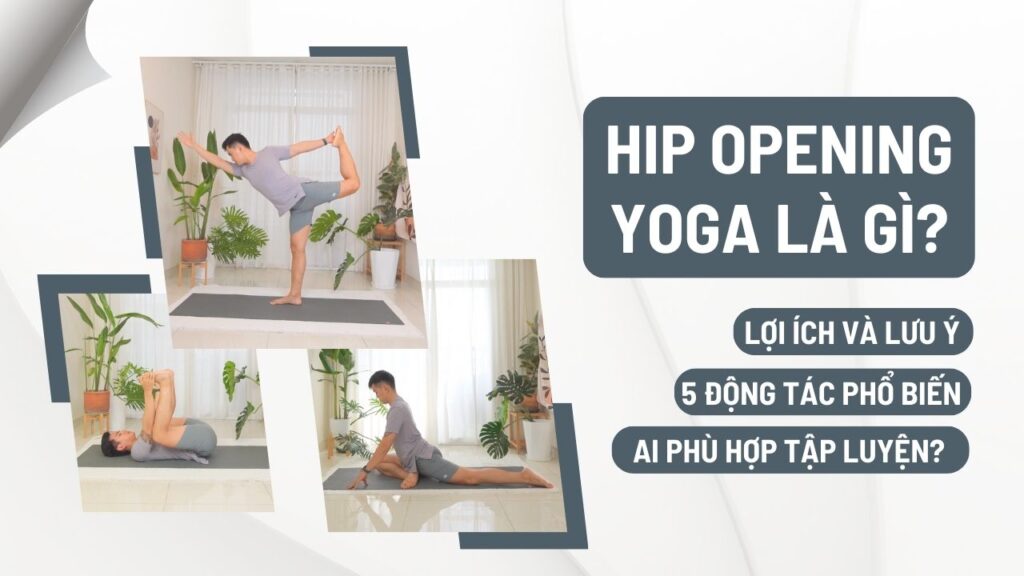
Hip opening Yoga is a practice method that brings physical liberation, emotional purification and brings a more comfortable feeling to the practitioner when moving. In this article, let's explore the nature of hip-opening Yoga, learn about its diverse benefits, and guide you through some basic poses.
What is Hip Opening Yoga?
Hip opening Yoga is a series of Yoga exercises that focus on expanding and increasing flexibility in the hip area. The hip area is a complex area comprised of many muscles, joints and bones, and can be susceptible to tightness. Many people experience tightness in the hips, especially those who sit frequently. Hip opening yoga will help increase hip flexibility and range of motion, improve flexibility, reduce problems caused by inactivity, and aid in reducing stress.
Benefits of practicing Hip opening Yoga
When conducting hip opening Yoga You will improve your range of motion and become more flexible. Additionally, there are many other benefits to performing hip openers, such as:
- Reduce stress: Hip opening poses help relieve tension and pressure built up in the hip area.
- Increased flexibility: These poses work the hip muscles and connective tissue, improving range of motion.
- Improves blood circulation: Hip opening yoga stimulates blood circulation to the hip area.
- Pain relief: The practice can relieve lower back and hip pain caused by tight muscles.
- Improve posture: The hip opening position stretches contracted muscles, supporting better spinal alignment.
Hip opening yoga poses
Happy Baby Pose
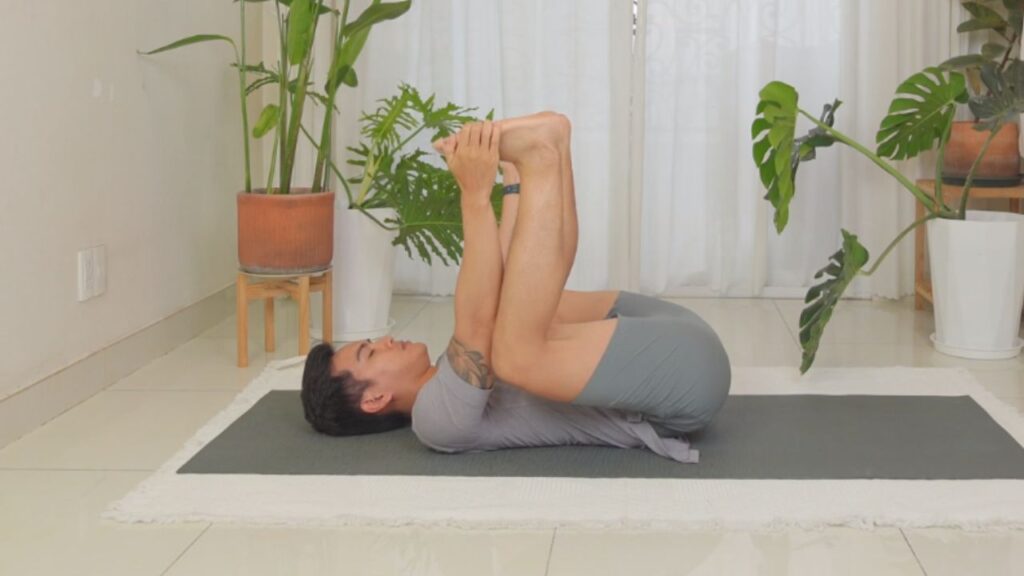
- To do this pose, lie on your back, bend your legs toward your chest, and hold the soles of your feet with both hands. Then open the knees wider than the body and pull them toward the armpits or floor.
- Lie down relaxed and breathe evenly. In addition, you can also roll your body left and right to relax and massage your spine.
- For those of you who have difficulty gripping your feet due to a stiff hip joint, you have two options. One is to hold the lower leg and the other is to bend one leg instead of two. It will make it easier for you to perform the pose.
King Dancer Pose
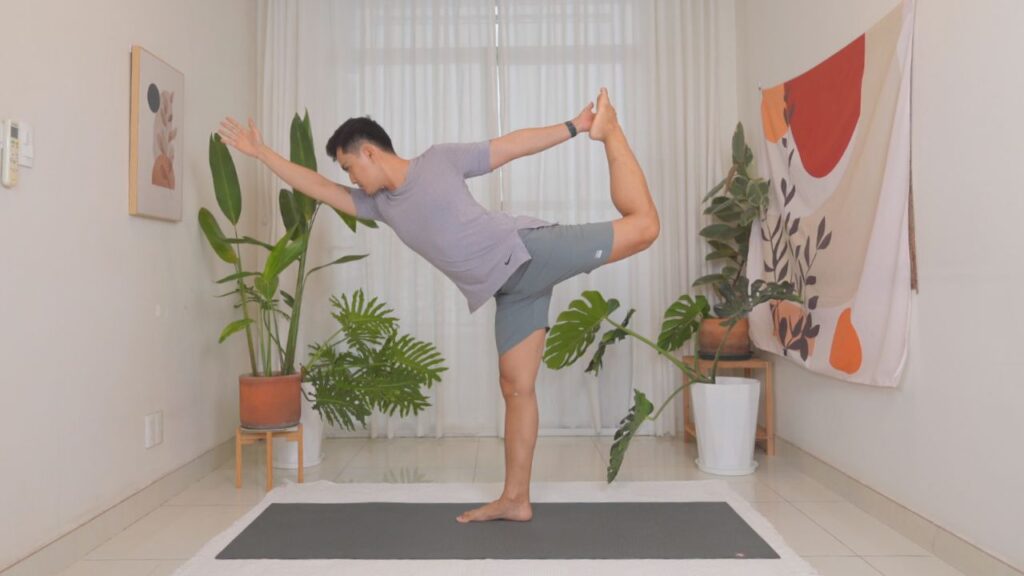
- To do this pose, stand straight on both feet, slowly lean forward, stand firmly on your right leg and lift your left leg.
- Then use your hand to grab the left leg and pull open the shoulder and hip joints. Continue to maintain balance and concentration, breathing evenly while holding the pose. Then switch sides and do the same.
Low Lunge Pose
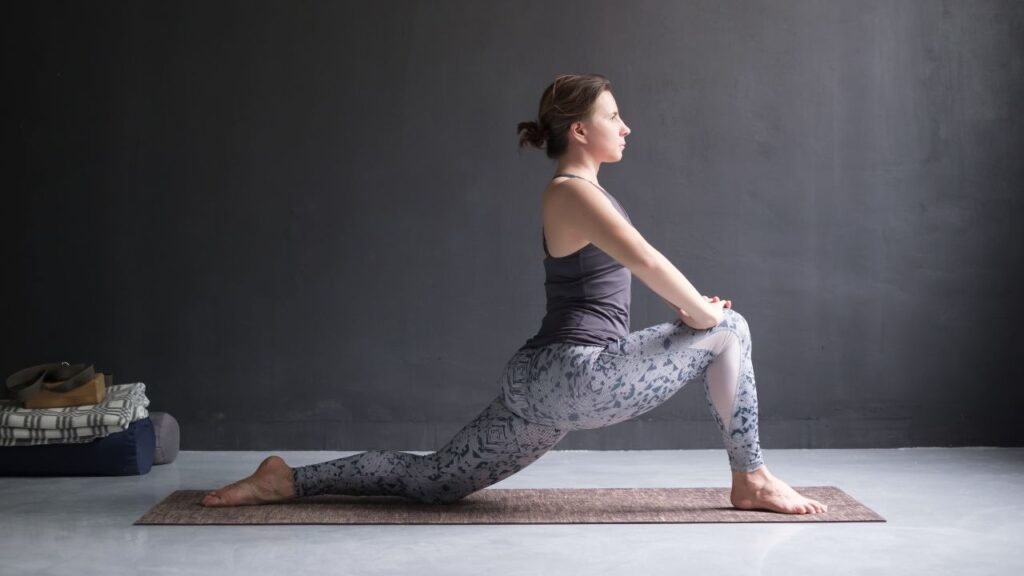
- Start in a standing position with your feet hip-width apart. Inhale and raise your arms above your head, palms facing each other. Exhale and bend forward, keeping your back straight. Place your hands on the floor in front of you, hands shoulder-width apart.
- Inhale and step one leg forward, lowering your front knee to the floor so your front thigh is perpendicular to the floor. Keep your back knee straight and your back heel touching the floor. Inhale and lift your torso, keeping your back straight. Raise your arms above your head, palms facing each other.
- Hold the pose for 5-10 breaths, focusing on feeling a stretch in the muscles of the legs, hips and thighs.
Pigeon Pose
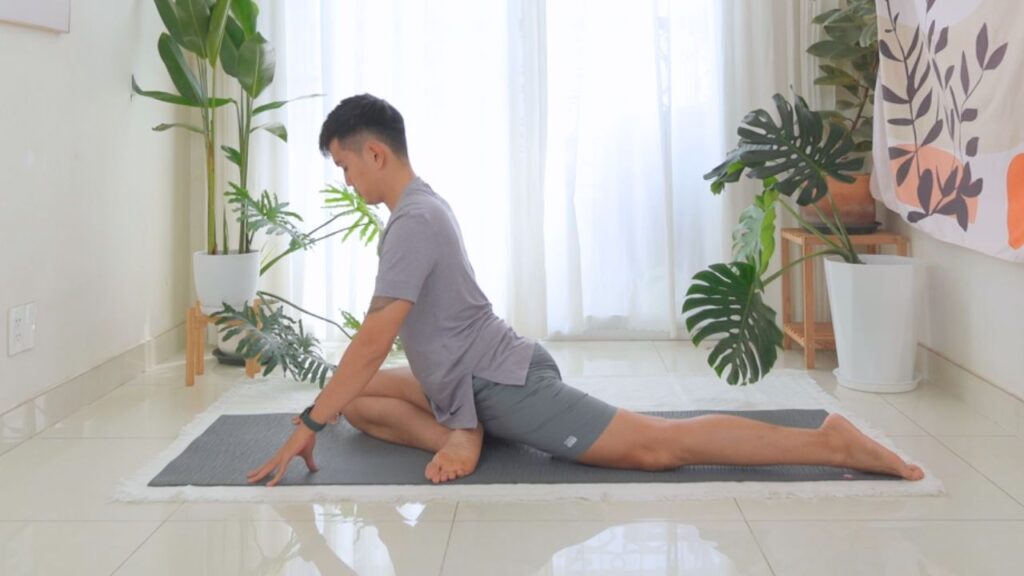
- To do this pose, start in table position or downward-facing dog position. Bend your right leg forward, shin diagonally inward, and stretch your left leg straight back, placing your thigh and toes flat on the mat.
- Next, align the hip joint forward perpendicularly, using your hands to support both sides.
- If you feel lower back pain or have degenerative disc herniation, lower your body forward to reduce pressure on your lower back.
Frog Pose
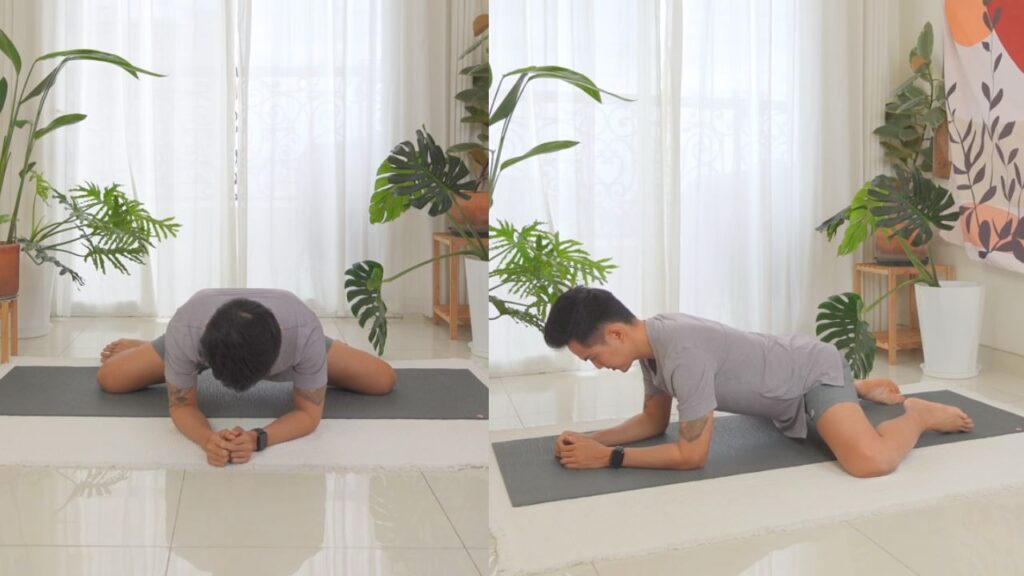
- To do this pose, start in table position. Slowly open your knees to the sides, while using your hands to support in front. Open your legs until you begin to feel a stretch in your groin and inner thigh muscles.
- A small tip is that you can use your hands to help spread your legs out to the sides. Note, if you feel pain and discomfort, narrow your legs as much as you can.
- You can stay here for 30 seconds to 1 minute breathing deeply and slowly.
Who is suitable for Hip opening Yoga?
Not everyone can perform hip openers effectively and safely. Below are some people who can practice Hip Opening Yoga most effectively:
- People who want to increase endurance: To improve mobility in sports or simply move more flexibly in daily life.
- People with joint stiffness: Due to the influence of sedentary habits and repetitive postures over long periods of time.
- Athletes who want to improve performance: Thanks to increased range of motion, an important factor affecting performance.
- People who want to reduce stress: Release tension and negative emotions accumulated in the hip area.
- People who want to improve posture: Helps correct poor sitting posture, imbalance, and reduce pain.
Note when practicing Hip opening Yoga
- Warm up the body: Work out the surrounding muscles before performing hip opening exercises. This helps you reduce the risk of injury, ensuring safer, more effective training.
- Patience is the key: It takes time to release tension and spasms in the body, especially in the hip area. Avoid rushing and over-exercising.
- Listen to your body: Pain is a sign that you need to stop or adjust your posture. Focus on steady breathing and body awareness.
- Use support tools: Blocks, blankets, and straps can help you perform poses more easily and safely.
- Exercise regularly: Short but frequent workouts will bring longer-term results than less intense workouts.
- Focus on breathing: Breathing regularly helps relax the body, release tension and create a feeling of safety when exercising.
Nguyen hopes that the above sharing will be useful in your training journey Yoga poses open your hips. Please see and look forward to more articles about Meditation and Yoga on the website Nguyen Yoga, besides there are also many other useful videos on Nguyen Yoga Youtube channel that you can refer to.

